NEW: T-Shirts

sábado, 12 de marzo de 2011

New Video : Jack Sparrow

I uploaded a new Video :)
A portrait of Jack Sparrow from Pirates of Caribbean done with a wacom tablet and photoshop.
Time of work: 4 hours
Tutorial here: http://danimix1983.blogspot.com/2011/01/photoshop-tutorial-how-to-make-digital.html

Video:
 

Final Pic:

martes, 15 de febrero de 2011

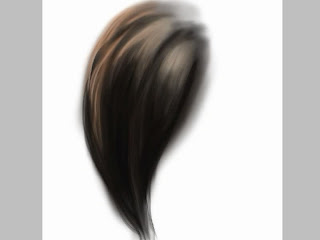
Photoshop Tutorial: How to make hair

On this tutorial I´ll explain how I make the hair on my digital portraits.
This example is a 15 min work.

We´ll need 3 layers and 3 different brushes, one brush for each layer.


 Hair layers.

All of these layers have Normal mask
 with 100% Opacity and 100% fill.


Start painting on layer1: Basic Hair Tones

Brush1 settings


Select a Hard Round Brush and configure it like the pic shows.
Also On Brush Tip Shape set: 5% Spacing and 25% hardness.

Press F5 to open the Brush settings window and configure it like the pic shows.
If you want to save this brush, here is explained how:
http://danimix1983.blogspot.com/2011/01/photoshop-tutorial-ironman-metal-effect.html


You should get something like this: (All done on layer1 with brush1 and playing with some color)


Layer2: Adding volume and details on the hair.
You will need another brush for painting on this layer.

Brush2 settings:


The brush is under default brushes, named
Round Fan Stiff Thin Bristles, select it and
Press F5 to open the Brush settings window.
Configure it like the pic shows.
Only check transfer with pen Pressure on.


  You should get something like this: (All done on layer2 with brush2)


Redefine edges on layer1 erasing some parts.
Layer3: Final touches:

You will need another brush for painting on this layer.

 Brush3 settings:


This brush is great for adding smalls details on the hair.


This is the result using this brush on layer3:


Finally we can soft a little the hair:

Select the smudge tool:
 Smudge tool + brush2 and paint on the same direction you painted the hair with 75% strength.


Here are some results using this method:


lunes, 31 de enero de 2011

Worm Planet

A concept art speed painting of a weird and crazy planet, infested by huge worms :)


martes, 18 de enero de 2011

Photoshop Tutorial - Ironman metal effect

On this tutorial I´ll show you how I did the metal effect on my Ironman Speed painting:


We´ll need two new brushes for making the Metal Effects, one for lights and another one for shadows.

For lights ---> dodge tool.
For shadows --> burn tool.


STEPS:

1. Select the dodge tool on the left tool bar:


dodge tool icon.


2. Settings of the dodge tool:


As you can see on this pic, select the Rough Round Bristle Brush under default brushes of photoshop.

Dodge Range = Highlights

Exposure = beetween 50% - 100%

Protect Tones Unchecked.


3. Settings of the Brush Rough Round Bristle (press F5 or go to Window/Brush)


Only transfer and Smoothing checked.

On transfer options be sure to set control = Pen Pressure.


Now we are ready, we can save our new brush with the following steps:


Our new brush will be saved here :)


Here is the Metal effect using this new dodge Brush:


Paint in the same direction all the time.


Finally, repeat all the steps we have done with the dodge tool but now with the Burn Tool.


Here is the Metal effect using this new Burn Brush:


 Paint in the same direction all the time.


So you have now 2 new brushes, use the dodge tool for making lights and the burn tool for making shadows.

Here is the video:


domingo, 16 de enero de 2011

Photoshop Tutorial - How to make Digital Portraits

This tutorial show all the steps I follow to make my latest digital portraits, using photoshop CS5.

Here are some results:


It is very important to have a digital tablet, mine is Wacom Intuos 4 Small (for me the size is not a problem ^^).

First step: Setting your brushes.

My most used brush is the default soft brush (under default photoshop brushes) but with the next configuration (see pic below).
To open the brush window Press F5 or go to Window/Brush.
  • 1. Select the soft brush.
  • 2. Check Transfer and Airbrush.
  • 3. In transfer settings set both control´s to Pen Pressure.


With these settings your tablet will
detect now the pressure of your pen.


Layers Setup:

Now we are going to create the layers we´ll need on our painting.
Press F7 or go to Window/Layers to view them.
As you probably now a layer is one image stacked on top of another.

My layer configuration is like the next one:


  • Hair: On this layer you have to paint just the hair, is good to have another hair layers for hair details and color (I´ll make another tutorial for painting the hair).
  • Sketch: This layer is for a basic sketch that will be very helpful, no details here.
  • Skin detail: This layer will be for fine small details such as wrinkles, ect. All with grayscales. Once you finish with all the details
  • Shadows/lights: As the name says, this is a layer for shadows and lights of everything except hair, again all done with grayscales, no color yet.
  • Color: Here we´ll add all the colors except hair color, only basic colors, all the shadows and lights are already done on top layer shadows/lights.
  • Background: Only background stuff here.
As you can see I use a layer for hair, fine details, sketch, shadows and lights, color and background.
All of these layers have normal mode except shadows/lights and skin detail.
shadows/lights and skin detail must have luminosity mode so when you are adding color on the color layer, these layers receive all the color from this color layer.


Starting the painting:

1. Start making a basic sketch on the sketch layer. (This layer is used only for help, will be disabled when the details are done).
Work hard with this layer, make sure the head and body are well proportioned.


2. Fill the sketch shape with a gray color on the shadows/lights layer


3. Start working with lights and shadows on the shadow/lights layer.


4. Add details (eyes details, nose, mouth,ect) on the skin detail layer while you are still working with lights and shadows of the face and body.


5. Start making the hair on the hair layer (you will need some more layers here for helping making the hair details, as I said I´ll make a tutorial of this too :) )


6. Once you are done with the hair start adding color to the face and body on the color layer.


7. Add color to the hair on another new separate layer.
8. Correct/add some more details, ect.

Final Result:
sábado, 15 de enero de 2011

New Animation video: The Lord of the Eggs

I uploaded a new animation video, inspired by the lord of the rings movie.
It took 1 week to complete, done with photoshop, magix, music maker and other programs.
This video have a spanish version too :)

I hope to make more animation videos, with better quality than this ^^